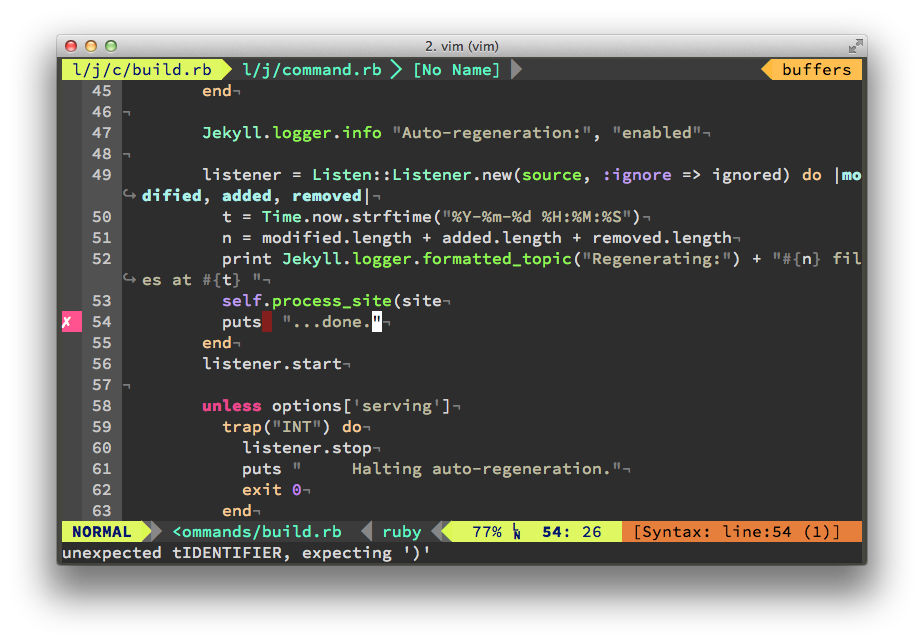
Figure 1: Sample screenshot editing my .vimrc
Vim is an excellent text editor. I've used it for many years and like most vim users, have collected a fairly large collection of settings in my .vimrc and learned how to grok my vim usage effectively through a lot of trial and error.
To that end, I've tried to assemble a useful overview of my experience with vim.
Foreword: Why?
Why would you want to even put in the effort to beef up vim?
- Portability. Carry your IDE everywhere with minimal effort, possibly even in just a single dotfile. (insert plug for homeshick here)
- Performance. Your IDE will start in under a second and you won't lose your mind if it crashes.
- Improved speed and precision. It takes a long time - don't get me wrong - but once you learn how to use vim the way it wants to be used, you'll like it.
- Vibrant community. This is one of hundreds of community resources for vim. If somebody has ever needed to do $task in vim, somebody has probably figured out a good way to do it.
Prelude: abide by these principles
A few things to keep in mind:
- Stop working with the new-file-new-tab paradigm. Read this answer on Stack Overflow for more.
- Don't start with a pre-built/huge
.vimrc. Build gradually to learn what you're doing. - Learn how to learn vim. Be cognizant of what slows you down, update your
.vimrcwith shortcuts you know, rinse, repeat.
Essential Settings
I mentioned not to get ahead of yourself with a massive .vimrc off the bat, but there are a few settings that you just plain need initially.
set nocompatible- This will get rid of antiquaited backwards-compatability settings and make vim a bit more usable.
set number- Turn on line numbers. This one is pretty obvious.
set ruler- Always display the status line at the bottom of the vim window (column, filename, etc.)
syntax on- Although other plugins build on this, the basic setting is a must.
Essential Plugins
These are plugins I use every time I open vim.
Ctrl-P
This will change the way you work with files. Stop browsing/pointing and clicking as you look for files and invoke a fuzzy text search for your file instead. Seriously handy.
Vim-Airline
By default vim's interface isn't terribly informative. Vim-airline is much more lightweight than other alternatives (like vim-powerline, which requires a lot of configuring) and offers out-of-the-box usefulness. Note that powerline-fonts can be tricky, but the exchange for your effort is an especially pretty interface.
Good-to-have Plugins
Vundle
There are many ways of managing plugins, namely pathogen and vundle. I used pathogen for a long time but now use Vundle as it can automate things a bit more, but either is a good choice and handy if you use many plugins.
Syntastic
Syntastic offers syntax and style checking without being overly complicated. If you're coding professionally, syntastic is pretty essential as it'll catch dumb mistakes like syntax errors, functionality that is pretty much taken for granted in a traditional IDE.
NERDTree
Although I mostly use Ctrl-P for navigating files, NERDTree is good to have around to visualize directory structure or when simply browsing code. vim's built-in netrw has similar functionality but is more finicky.
Putting it together
I've mentioned good plugins and settings, but how does it look?
If I were to hand you a template .vimrc, I'd start with this:
- Font used to highlight strings.
- Font used to highlight function names.
- Font used to highlight constants and labels.
- Font used for Vim’s configuration options.
- Font used for Vim Ex commands.
- Font used to highlight comments.
- Font used to highlight comment delimiters.
" Basic settingsset nocompatible " Eliminate backwards-compatabilityset number " Enable line numbersset ruler " Turn on the rulersyntax on " Syntax highlighting" Pluginsfiletype off " Req'd for vundleset rtp+=~/.vim/bundle/vundle " Vundle preludecall vundle#rc() " ^Bundle 'gmarik/vundle'Bundle 'scrooloose/nerdtree'Bundle 'kien/ctrlp.vim'Bundle 'scrooloose/syntastic'Bundle 'bling/vim-airline'Bundle 'xolox/vim-misc'Bundle 'xolox/vim-easytags'" Post-vundlefiletype plugin indent on " Req'd for vundle
Then use vundle to install your bundled plugins:
shellgit clone https://github.com/gmarik/vundle.git ~/.vim/bundle/vundlevim +BundleInstall +qall
You're ready to go. Let's look at a practical example.
Post-exercise
This was a contrived example, but you can extrapolate from here. For example, as fuzzy searching for files is useful, fuzzy searching for tags is even moreso. Ctrl-P has a function for this. Here's the steps you'd take to implement a shortcut for yourself.
- Look at Ctrl-P's help page.
:help ctrlp - Search for tag support (search for tags with
/tags<enter>and hitna few times before you find what you want) - You'll find that the command
:CtrlPTagexists which will search available tags. - Create a nice shortcut to invoke the command. The following snippet will work:
- Font used for Vim Ex commands.
nnoremap <leader>t :CtrlPTag<CR>
Now <leader>t will open up Ctrl-P's tag search window. Leader commands provide you with a good starting point for custom commands – by default, <leader> is mapped to \. Thus the keystroke \t while in normal mode will open up the fuzzy tag search window.
Conclusion
This only scratches the surface of what you can do with vim, and I myself have a big .vimrc with lots of changes not mentioned here. As I mentioned, start with a basic foundation and gradually build up your .vimrc as you think of ways to streamline your workflow or run into nice plugins or settings around the Internet.
